This month we are also using the wonderful adhesives from Beacon Adhesives in our work. It's true, the right tool for the job makes it much easier, and the different products from Beacon allow you to work with virtually any media.
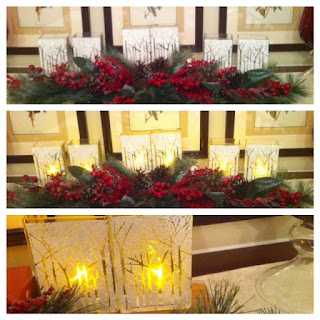
Last year I created a set of candle holders using flat sided vases from IKEA, the LJ849 Bare trees stencil, Glossy White Embossing Paste, and Crystal glitter.

- I started with one of the smaller lanterns from IKEA (only $4.99 if you are an IKEA family member!). The nice thing about these is that you can very easily remove the panes of glass while you work on them. I kept them in order so they would fit back in correctly
- Clean the glass, then lay the Pine cones stencil (LG675) at an angle over the glass panel so the whole image fits on the glass, tape in place with removable tape
- Use a palette knife and paste spreader to apply a coat of Matte Black Embossing Paste over the stencil
- Carefully remove the stencil and place in water for cleaning, set the glass aside to dry
- Clean and dry your stencil
- Repeat this process until all four panes of glass are pasted
- Bring the first pane back in front of you and use a soft brush to VERY GENTLY apply Metallic F/X powders over the black paste. I used Cocoa on the stems, Forestry on the needles, and a combination of Eye of the Tiger and Amber Glow on the pine cones. Don't worry about powder residue on the glass, once it is completely dry, you can get it off easily with a Swiffer cloth
- Repeat for the other panes
- Re-assemble the lantern, decorate it with a pretty ribbon from May Arts, attach a couple of pine cones near the ribbon with Beacon Adhesives Zip Dry, and put a candle and some small pine cones inside
- Some greenery near the base looks good too!
I've only made one so far, but I'm going to make a set of them for my son and daughter-in-law for their new fireplace! These are easy and so pretty. There are several Dreamweaver Stencils images that would work great for this project, depending on the season or your setting.
Leave a comment, them link over to see what the rest of team has created this week for you!
Happy Creating,
Louise
.JPG)
.JPG)

4 comments:
WOW...your lantern is gorgeous!
Oh my goodness Louise! The lantern is fabulous and what a wonderful gift! Your vases are stunning as well. Are you really that organized for the holidays already?!?
Wow. It is scary how much we think alike. I did a lantern as well with the same stencil! Just haven't posted it yet! Love this, Louise.
I so want to be your friend :) How wonderful to receive a gift like that!
Post a Comment